Category: Web Development
Tags:TallyPrime, financial dashboard, real-time sync, React, Node.js, MySQL, XML API, web automation, financial data integration, business intelligence,
Why Your Business Needs a Real-Time Financial Sync Dashboard with TallyPrime
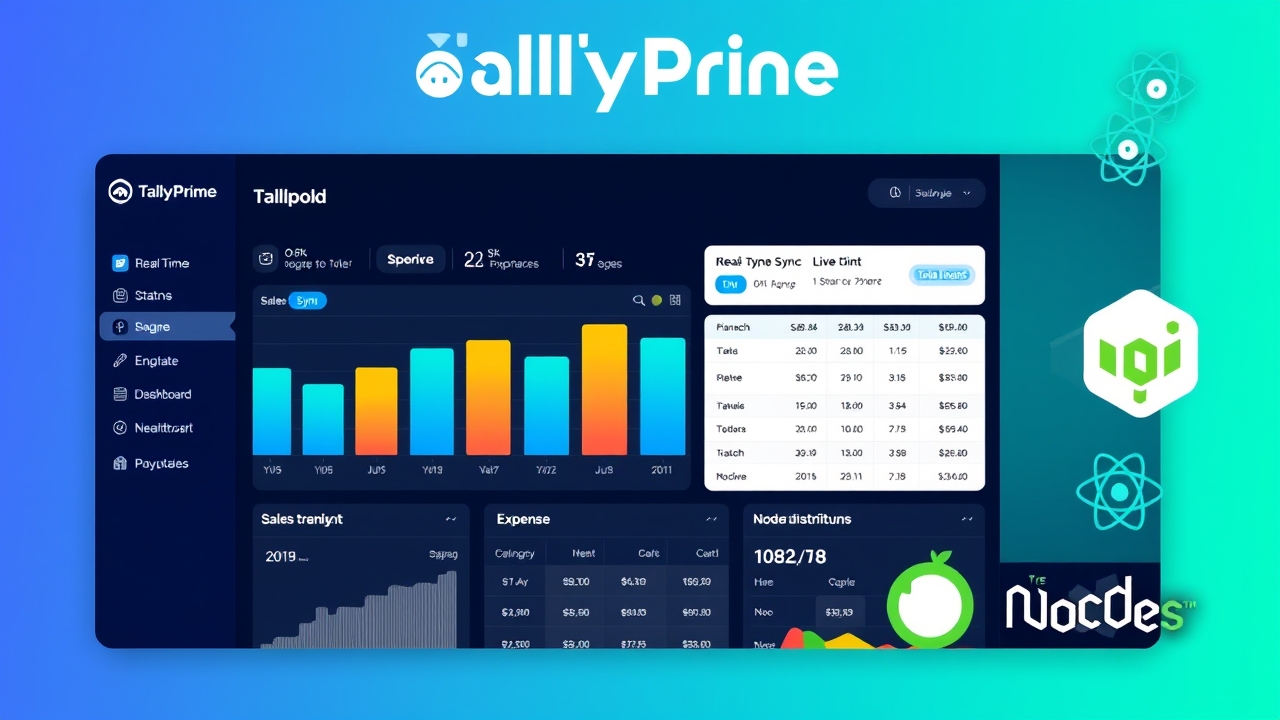
In today’s fast-paced business environment, financial data accuracy and timeliness are non-negotiable. Traditional methods like manual data entry or exporting reports from TallyPrime to Excel are not only time-consuming but also prone to errors. A real-time financial sync dashboard eliminates these inefficiencies by automatically pulling, processing, and visualizing data from TallyPrime as it happens. This ensures that business owners, accountants, and stakeholders always have access to the most up-to-date financial insights without the hassle of manual updates or duplicate entries. By integrating TallyPrime with modern web technologies, you can transform raw financial data into actionable intelligence, enabling faster decision-making and reducing the risk of costly mistakes.
#FinTech #DataEngineering #APIs #SoftwareEngineering #RealTimeData
Prerequisites: Tools and Technologies You’ll Need
- TallyPrime software installed with XML API enabled (TallyPrime 4.0 or later recommended).
- Basic knowledge of JavaScript, React, and Node.js for frontend and backend development.
- MySQL database for storing and managing financial data with proper schema design.
- Postman or similar API testing tool to validate TallyPrime XML API endpoints.
- Git for version control and collaborative development.
- A modern code editor like Visual Studio Code or Sublime Text.
- Hosting service (e.g., AWS, Vercel, or Heroku) for deploying your dashboard.
- Optional: Docker for containerizing your application for easier deployment and scaling.
Step 1: Setting Up the TallyPrime XML API Connection
The first step in building your real-time financial sync dashboard is establishing a connection between TallyPrime and your web application using the XML API. TallyPrime’s XML API allows for bidirectional communication, meaning you can both fetch financial data from TallyPrime and push updates back to it. To get started, ensure that XML API access is enabled in your TallyPrime configuration. You’ll need to configure the API settings to specify the port, authentication, and the endpoints you want to access. Common endpoints include sales, purchases, inventory, and ledger data. Use Postman to test the API endpoints and verify that you can retrieve data successfully before integrating it into your application.
Step 2: Designing the MySQL Database Schema for Financial Data
A well-designed database schema is the backbone of your financial sync dashboard. Start by identifying the key financial entities you need to track, such as transactions, ledgers, invoices, and inventory. For a TallyPrime integration, your MySQL database should mirror the structure of TallyPrime’s data model to ensure seamless syncing. Common tables include `transactions`, `ledgers`, `invoices`, `stock_items`, and `account_groups`. Define relationships between these tables using foreign keys to maintain data integrity. For example, each transaction should link to a specific ledger and invoice. Additionally, include fields for timestamps, status flags, and error logs to track sync statuses and troubleshoot issues.
Step 3: Building the Node.js Backend for API Integration
The Node.js backend acts as the intermediary between TallyPrime’s XML API and your frontend dashboard. Start by setting up a new Node.js project with Express.js for routing and middleware. Install necessary packages like `axios` for making HTTP requests to TallyPrime, `mysql2` for MySQL database interactions, and `xml2js` for parsing XML responses from TallyPrime. Create API endpoints for fetching financial data (e.g., `/api/sales`, `/api/purchases`) and pushing updates (e.g., `/api/sync-transactions`). Implement authentication using JWT (JSON Web Tokens) to secure your endpoints. Add error handling to manage API failures, timeouts, or invalid data formats. Finally, set up a cron job or scheduler to run periodic syncs (e.g., every 5 minutes) to ensure data is always up-to-date.
Step 4: Developing the React Frontend for Data Visualization
The React frontend is where you bring your financial data to life through interactive dashboards, charts, and tables. Start by creating a new React project and setting up routing using React Router for different views (e.g., sales, expenses, inventory). Use state management libraries like Redux or Context API to handle global data states, such as the latest financial data fetched from the backend. For data visualization, integrate libraries like Chart.js or Recharts to create dynamic charts (e.g., bar graphs for sales trends, pie charts for expense breakdowns). Implement filters and search functionality to allow users to drill down into specific time periods or accounts. Ensure your frontend is responsive and mobile-friendly to cater to users on the go.
Step 5: Implementing Bidirectional Data Flow and Sync Logic
A real-time financial sync dashboard requires seamless bidirectional data flow between TallyPrime and your web application. Start by implementing a sync logic that periodically checks TallyPrime for new or updated transactions and pushes them to your MySQL database. Conversely, allow users to make changes in your dashboard (e.g., correcting a ledger entry) and sync those changes back to TallyPrime. Use a queue system (e.g., Bull or Agenda) to manage sync tasks and handle conflicts. For example, if a transaction is modified in both TallyPrime and your dashboard simultaneously, implement conflict resolution rules (e.g., last-write-wins or manual review). Add validation checks to ensure data integrity before syncing.
Step 6: Handling Errors, Logging, and Notifications
No system is perfect, and errors are inevitable. To ensure your financial sync dashboard is robust, implement comprehensive error handling and logging. On the backend, log API failures, database errors, and sync conflicts to a dedicated logging system (e.g., Winston or Morgan). Use structured logging to capture error details, timestamps, and stack traces for debugging. On the frontend, display user-friendly error messages and notifications when syncs fail or data is stale. Implement a retry mechanism for failed syncs and alert users via email or in-app notifications when critical issues arise. Regularly review logs to identify patterns and improve system reliability.
Step 7: Deploying Your Financial Sync Dashboard
Deploying your dashboard involves configuring your hosting environment, setting up continuous integration/deployment (CI/CD) pipelines, and ensuring scalability. For the backend, deploy your Node.js application to a platform like Heroku, AWS Elastic Beanstalk, or a VPS. Set up a MySQL database on a managed service like AWS RDS or DigitalOcean Managed Databases. For the frontend, use Vercel, Netlify, or AWS Amplify for seamless deployment and automatic updates. Configure environment variables for API keys, database credentials, and other sensitive data. Implement monitoring tools like Prometheus or New Relic to track performance metrics and uptime. Finally, set up SSL certificates to secure user data and ensure compliance with data protection regulations.
Step 8: Best Practices for Security, Performance, and Scalability
Building a production-ready financial sync dashboard requires adhering to security, performance, and scalability best practices. For security, use HTTPS for all communications, implement rate limiting to prevent API abuse, and sanitize all user inputs to prevent SQL injection or XSS attacks. For performance, optimize database queries with indexing, cache frequently accessed data using Redis, and use lazy loading for frontend components. For scalability, design your architecture to handle increased load by using load balancers, microservices, or serverless functions. Regularly update dependencies to patch security vulnerabilities and monitor system performance using tools like Grafana or Datadog.
Advanced Features: Analytics, Automations, and AI Insights
Once your financial sync dashboard is up and running, consider adding advanced features to enhance its value. Implement predictive analytics using machine learning models to forecast cash flow, sales trends, or inventory needs. Add automation rules to trigger actions based on specific conditions (e.g., send an alert when expenses exceed a budget). Integrate AI-powered chatbots to allow users to query financial data using natural language. You can also extend your dashboard to support multi-company setups or integrate with other financial tools like QuickBooks or Xero for a unified financial ecosystem.
Conclusion: Transform Your Financial Workflow with Real-Time Sync
By integrating TallyPrime with a modern web dashboard, you can eliminate the inefficiencies of manual data entry and Excel-based workflows. A real-time financial sync dashboard provides instant access to accurate financial data, enabling faster decision-making and reducing the risk of errors. Whether you’re a small business owner or an enterprise accountant, this integration can save you hours of work each week while providing deeper insights into your financial health. Start building your dashboard today and experience the freedom of real-time financial data at your fingertips.